;;;;;;;;;;;
Description ;;;;;;;;;;;;;;;
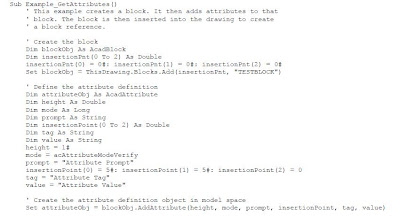
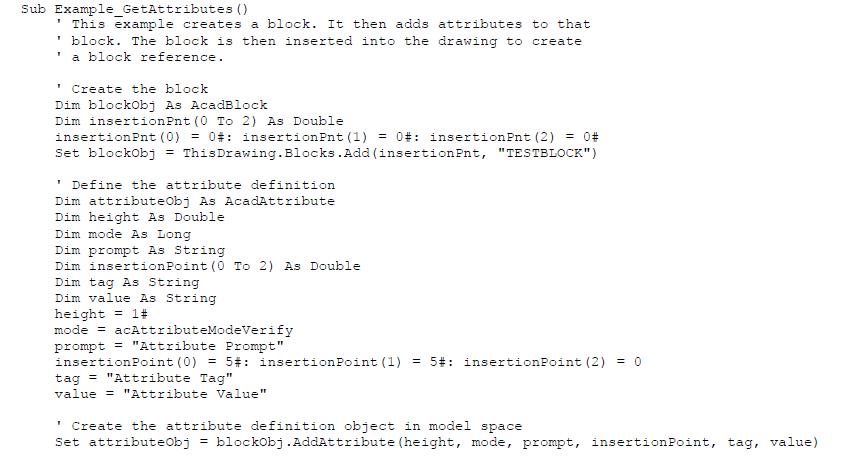
This macro to be inserted into a module and
parametrized with your own values (range(x)) (it works only in AutoCAD 2008 but can be easily changed).
This macro to be inserted into a module and parametrized with your own values.
This macro combines many VBA functions to draw in AutoCAD a retaining wall section.
It's up to you to imagine all possibilities that it opens.
The code is free of use and to be extended as you wish.
;;;;;;;;;;;;;;;;;;;;;;;;;;;;;;;;;;
'MACRO REALIZED BY DDM
Sub CUTWALLtoCAD()
On Error Resume Next
With ThisWorkbook.VBProject.References
Application.DisplayAlerts = False
.AddFromFile "C:\Program Files\Common Files\Autodesk Shared\acax17fra.tlb"
End With
Application.DisplayAlerts = True
On Error GoTo 0
Dim AcadApp As AcadApplication
On Error Resume Next
Set AcadApp = GetObject(, "AutoCAD.Application.17")
If Err Then
Err.Clear
Set AcadApp = CreateObject("AutoCAD.Application.17")
End If
MsgBox "Now running! : " + AcadApp.Name + " version :" + AcadApp.Version
Set AcadDoc = AcadApp.Application.ActiveDocument
AcadDoc.Regen acActiveViewport
ZoomAll
AcadApp.Application.Visible = True
'-------------------- TO DRAW WALL OUTLINE -------------
Dim getcenter As Variant
Dim plineObj As AcadPolyline
Dim points(0 To 26) As Double
getcenter = AcadDoc.Utility.GetPoint(, "Insertion Point ?")
' Define the 2D polyline points
points(0) = getcenter(0): points(1) = getcenter(1): points(2) = getcenter(2)
points(3) = points(0): points(4) = points(1) +
Range("C13"): points(5) = 0
points(6) = points(3)
- Range("C15"): points(7) = points(4): points(8) = 0
points(9) = points(6): points(10) = points(7)
+ Range("C17"): points(11) = 0
points(12) = points(9)
- Range("C14"): points(13) = points(10): points(14) = 0
points(15) = points(12): points(16) = points(13)
- Range("C17"): points(17) = 0
points(18) = points(0) - Range("c16"): points(19) = points(1)
+ Range("C13"): points(20) = 0
points(21) = points(0) - Range("c16"): points(22) = points(1): points(23) = 0
points(24) = points(0): points(25) = points(1): points(26) = 0
' Create a lightweight Polyline object in model space
Set plineObj = AcadDoc.ModelSpace.AddPolyline(points)
plineObj.Closed = True
plineObj.Update
'-------------------- -------------
Dim plineterre1Obj As AcadPolyline
Dim pts_terre1(0 To 5) As Double
' Define the 2D polyline points
pts_terre1(0) = points(6): pts_terre1(1) = points(7) + Range("C19"): pts_terre1(2) = 0
pts_terre1(3) = points(0) + 500: pts_terre1(4) = pts_terre1(1): pts_terre1(5) = 0
Set plineterre1Obj = AcadDoc.ModelSpace.AddPolyline(pts_terre1)
Dim plineterre2Obj As AcadPolyline
Dim pts_terre2(0 To 5) As Double
' Define the 2D polyline points
pts_terre2(0) = points(15): pts_terre2(1) = points(7) + Range("C18"): pts_terre2(2) = 0
pts_terre2(3) = points(18) - 500: pts_terre2(4) = pts_terre2(1): pts_terre2(5) = 0
Set plineterre2Obj = AcadDoc.ModelSpace.AddPolyline(pts_terre2)
Dim plineterre3Obj As AcadPolyline
Dim pts_terre3(0 To 11) As Double
pts_terre3(0) = pts_terre1(0): pts_terre3(1) = pts_terre1(1): pts_terre3(2) = 0
pts_terre3(3) = pts_terre1(3): pts_terre3(4) = pts_terre1(4): pts_terre3(5) = 0
pts_terre3(6) = pts_terre3(3): pts_terre3(7) = pts_terre3(4) - 150: pts_terre3(8) = 0
pts_terre3(9) = pts_terre3(0): pts_terre3(10) = pts_terre3(1) - 150: pts_terre3(11) = 0
Set plineterre3Obj = AcadDoc.ModelSpace.AddPolyline(pts_terre3)
plineterre3Obj.Closed = True
plineterre3Obj.Visible = False
Dim plineterre4Obj As AcadPolyline
Dim pts_terre4(0 To 11) As Double
' Define the 2D polyline pts_terre4 pour la réalisation des hachures
pts_terre4(0) = pts_terre2(0): pts_terre4(1) = pts_terre2(1): pts_terre4(2) = 0 '1er point des terres sur patin avant
pts_terre4(3) = pts_terre2(3): pts_terre4(4) = pts_terre2(4): pts_terre3(5) = 0
pts_terre4(6) = pts_terre4(3): pts_terre4(7) = pts_terre4(4) - 150: pts_terre4(8) = 0
pts_terre4(9) = pts_terre4(0): pts_terre4(10) = pts_terre4(1) - 150: pts_terre4(11) = 0
Set plineterre4Obj = AcadDoc.ModelSpace.AddPolyline(pts_terre4)
plineterre4Obj.Closed = True
plineterre4Obj.Visible = False
'-------------------- -------------
Dim hatchObj As AcadHatch
Dim hatchObj1 As AcadHatch
' Create the outer boundary for the hatch. (a circle)
Dim outerLoop(0 To 0) As AcadEntity
Dim outerLoop1(0 To 0) As AcadEntity
Set outerLoop(0) = plineterre3Obj
Set outerLoop1(0) = plineterre4Obj
'Create the associative Hatch object in model space
Set hatchObj = AcadDoc.ModelSpace.AddHatch(acHatchPatternTypePreDefined, "EARTH", True)
Set hatchObj1 = AcadDoc.ModelSpace.AddHatch(acHatchPatternTypePreDefined, "EARTH", True)
' Append the outerboundary to the hatch object, and display the hatch
hatchObj.PatternScale = 10
hatchObj.AppendOuterLoop (outerLoop)
hatchObj.Evaluate
hatchObj1.PatternScale = 10
hatchObj1.AppendOuterLoop (outerLoop1)
hatchObj1.Evaluate
AcadDoc.Regen acActiveViewport
ZoomAll
AcadApp.Application.Visible = True
End Sub